Drywall Durability: The Secret to a Low-Maintenance Home
When it comes to creating a comfortable and low-maintenance home, durability is a key factor to consider. A durable home not only stands the test of time but also reduces the need for constant repairs and maintenance. One often-overlooked hero in this quest for durability is drywall. In this guide, we’ll uncover the secrets behind drywall’s durability and how it can lead to a low-maintenance home.
Understanding the Foundation: The Role of Drywall
Drywall, also known as gypsum board or plasterboard, serves as the canvas for the walls and ceilings of your home. It’s an essential building material that provides a smooth, paintable surface. But drywall is more than just a surface; it’s the backbone of your interior spaces.
The Recipe for Resilience: What Makes Drywall Durable
-
Resistant to Cracks and Dents
Drywall is designed to withstand the everyday wear and tear of a home. It resists cracks and dents, maintaining the integrity of your walls and ceilings, even in high-traffic areas. This durability means less need for touch-ups and repairs over the years.
-
Fire-Resistant Properties
One of the remarkable features of drywall is its fire-resistant nature. In the event of a fire, drywall can slow the spread of flames, providing valuable time for safe evacuation. This built-in fire resistance contributes to the safety and long-term durability of your home.
-
Soundproofing Abilities
Drywall can also serve as an effective sound barrier. By reducing the transmission of noise between rooms, it contributes to a quieter and more peaceful living environment. You can enjoy a low-maintenance home without the disturbances of sound-related issues.
-
Moisture Resistance
In areas prone to moisture, such as bathrooms and kitchens, moisture-resistant drywall is a key player. It’s designed to resist the effects of dampness and humidity, which can cause other materials to deteriorate. With moisture-resistant drywall, you can have confidence in your home’s long-term durability, even in moisture-prone spaces.
The Cost-Effective Choice: Long-Term Savings with Drywall
The initial investment in high-quality drywall pays off in the long run. Its durability and low-maintenance nature translate to significant savings over the years. With less need for repairs and replacements, you can allocate your budget to other aspects of your home.
Maximizing Durability with Proper Installation
-
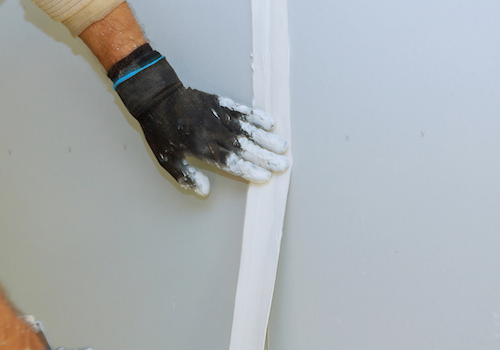
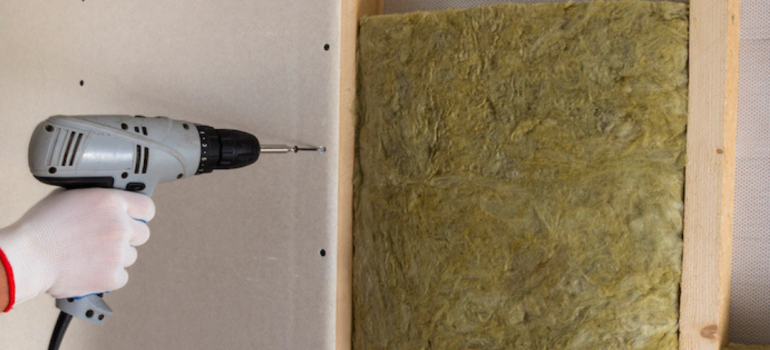
Professional Installation Matters
While durable drywall is crucial, proper installation is equally essential. The skills and expertise of a professional installer ensure that your drywall performs at its best and maintains its resilience over time.
-
Sealing and Painting
Adding an extra layer of protection, such as sealing and painting your drywall, can enhance its durability. Sealing the drywall with a primer and applying high-quality paint not only adds to its longevity but also contributes to the aesthetics of your home.
-
Maintenance and Repairs
While drywall is low-maintenance, it’s not entirely maintenance-free. Regular inspection and addressing minor issues promptly can prevent more extensive and costly repairs in the future. Keeping an eye on your drywall ensures it continues to serve as the backbone of your low-maintenance home.
A Showcase of Durability: Project Examples
-
Residential Homes
Drywall is the backbone of residential interiors. From living rooms to bedrooms and kitchens, it endures daily use, maintaining the look and feel of your home for years. With the right care and maintenance, it contributes to a low-maintenance lifestyle.
-
Commercial Spaces
Commercial spaces, including offices and retail stores, rely on the durability of drywall to create professional and inviting environments. In high-traffic areas, its resilience stands up to the demands of daily operations, requiring minimal upkeep.
Conclusion
Drywall is more than just a surface; it’s the secret to a low-maintenance home. Its inherent durability, resistance to damage, and fire-resistance properties provide a reliable and long-lasting foundation for your living space. By investing in high-quality drywall and ensuring proper installation and maintenance, you can enjoy a low-maintenance home for years to come.
To experience the benefits of a low-maintenance home with the enduring power of drywall, contact RGZ Cambridge today. With over 20 years of experience in both residential and commercial projects, we specialize in creating durable and efficient interiors. Choose durability, choose reliability, choose RGZ Cambridge for your next project.